There is also a TLDR; at the bottom.
This is the biggest project I’ve ever built. To-date, this makes only one of three projects I’ve ever built. I studied a lot of plans and a lot of how-tos. I watched a ton of youtube videos. The how-tos by threeball and metolius were the ones I used for the most reference. I did, however, make my own modifications to the steps. Links to the how-tos are at the bottom of this post.
If you want to know how to find the studs in the wall or whatever, I suggest you read the how-tos from the other sites because I’m not going to cover any of that.
This guide IS going to cover how I put up a vertical three sheet of plywood wall with t-nuts, holds, and mostly alone.
Backstory: My kids were complaining that they didn’t have a place to play doing something they liked. They’ve almost grown out of barbies and cars… I don’t know that anyone actually grows out of those, I digress. In any case, the playset they had was torn down and their neighbor friend moved away – so they have an empty yard. We designed a whole yard amusement park including a half-pipe for bikes and skates, a climbing wall, a warped wall, a pegboard, horizontal ladder rungs, and more. All of the pieces except the half-pipe would be contained in two sections so they wouldn’t spread all over the yard. The downside to this backyard wonderland was weather. As I also mentioned I haven’t built much so I felt like I was way underqualified to build any of it – despite my 2000 viewing hours of Home Time and This Old House. I did a ton of research on what to do and how to build it. I just didn’t have the money to pay someone to build it. That was until 2 weeks ago when I looked into the downstairs hallway that isn’t used much. I thought I could put up a climbing wall in the hallway complete with ceiling work – at 9′ or so I could put padding on the floor and the kids could use it. Then I went into the “toy room” aka the “play room” – it’s the room the kids have their toys and they play with them. While in there I realized the kids don’t really use that room and I needed to get rid of about 8 boxes of recycleables and trash. However, the room is huge 14×16 or something like that and the kids really only play with one 5×4 section of the room. The rest is temporary storage of the recycleables and a few tubs of toys they play with. So I texted my wife and asked what she thought about putting the wall in that room that has a 10.5′ ceiling. I expected to be shot down, instead she agreed that it would be cool. We spend a lot of money on a nearby ninja warrior gym and a rock wall at a nearby community center. We spend more time going to those places than we do anything else… and it can be a pain in the ass to get somewhere and find out it’s closed that day or they changed hours or there’s a birthday party or a scheduled class. Even worse, is when the kids are climbing and some other kids show up who are completely disrespectful and their parents are douches. In any case, the wall was to be built in the play room. The other issue at hand was what if i put in these posts in the ground and the kids played with the outdoor rock wall a few times then decided they were done. If I put it inside then I could use it anytime inspite of the weather and the kids could use it anytime – if they didn’t want to then they could continue to play in the space with the barbie house or outside.
 |
| The playroom before |
I measured the wall – 12.2′ wide so plenty of room for three sheets of plywood. So I went to Lowe’s and picked up three sheets of plywood and 8 2x4x12s – I only used 6.
 |
| The flames at the top are an X-wing kite |
I would be doing most of this alone. Me, a ladder and some really long boards that I didn’t know how I was going to lift and hold in place.
I already had the studs marked so I put two plastic tubs down to hold my first 2x4x12 up close to in place so I could mark the studs on the board and get it screwed into place.


At that point I screwed in the first two screws and then kept going like that until all of the boards were up.


 |
| my daughter “testing” the boards |
 |
| my son also “testing” the boards after I installed one sheet |
At this point, I followed the instructions in the threeballclimbing pdf. I found the smooth side of the plywood which I call the front. I started marking the back side from the top of the plywood sheet (longways) at 3″ then added 7″ all the way down (so 3″, 10″, 17″, 24″, etc). I then turned the plywood horizontal and started at the top and marked the same way. Then I connected the marks with chalk line. I put the chalk line on the back of the plywood. If you’re going to paint then you can put them on the front of the plywood.


It’s at this point that you’ll have a choice to make on drilling out the holes. I used a 7/16 spade bit to drill out the holes. If you put your lines on the front then you can just drill from the front to the back. If you put your lines on the back then you’ll want to do something different.
When you drill through the bit will shred the opposite side of the wood. If you put your lines on the back and start drilling that means that you’ll tear up the front side. What I did for my first two sheets was drill from back to front tearing up the wood.

What I did for the third sheet is start drilling through from the backside until the bit poked out the front. This turned out to be about where the “7” was on the spade bit.
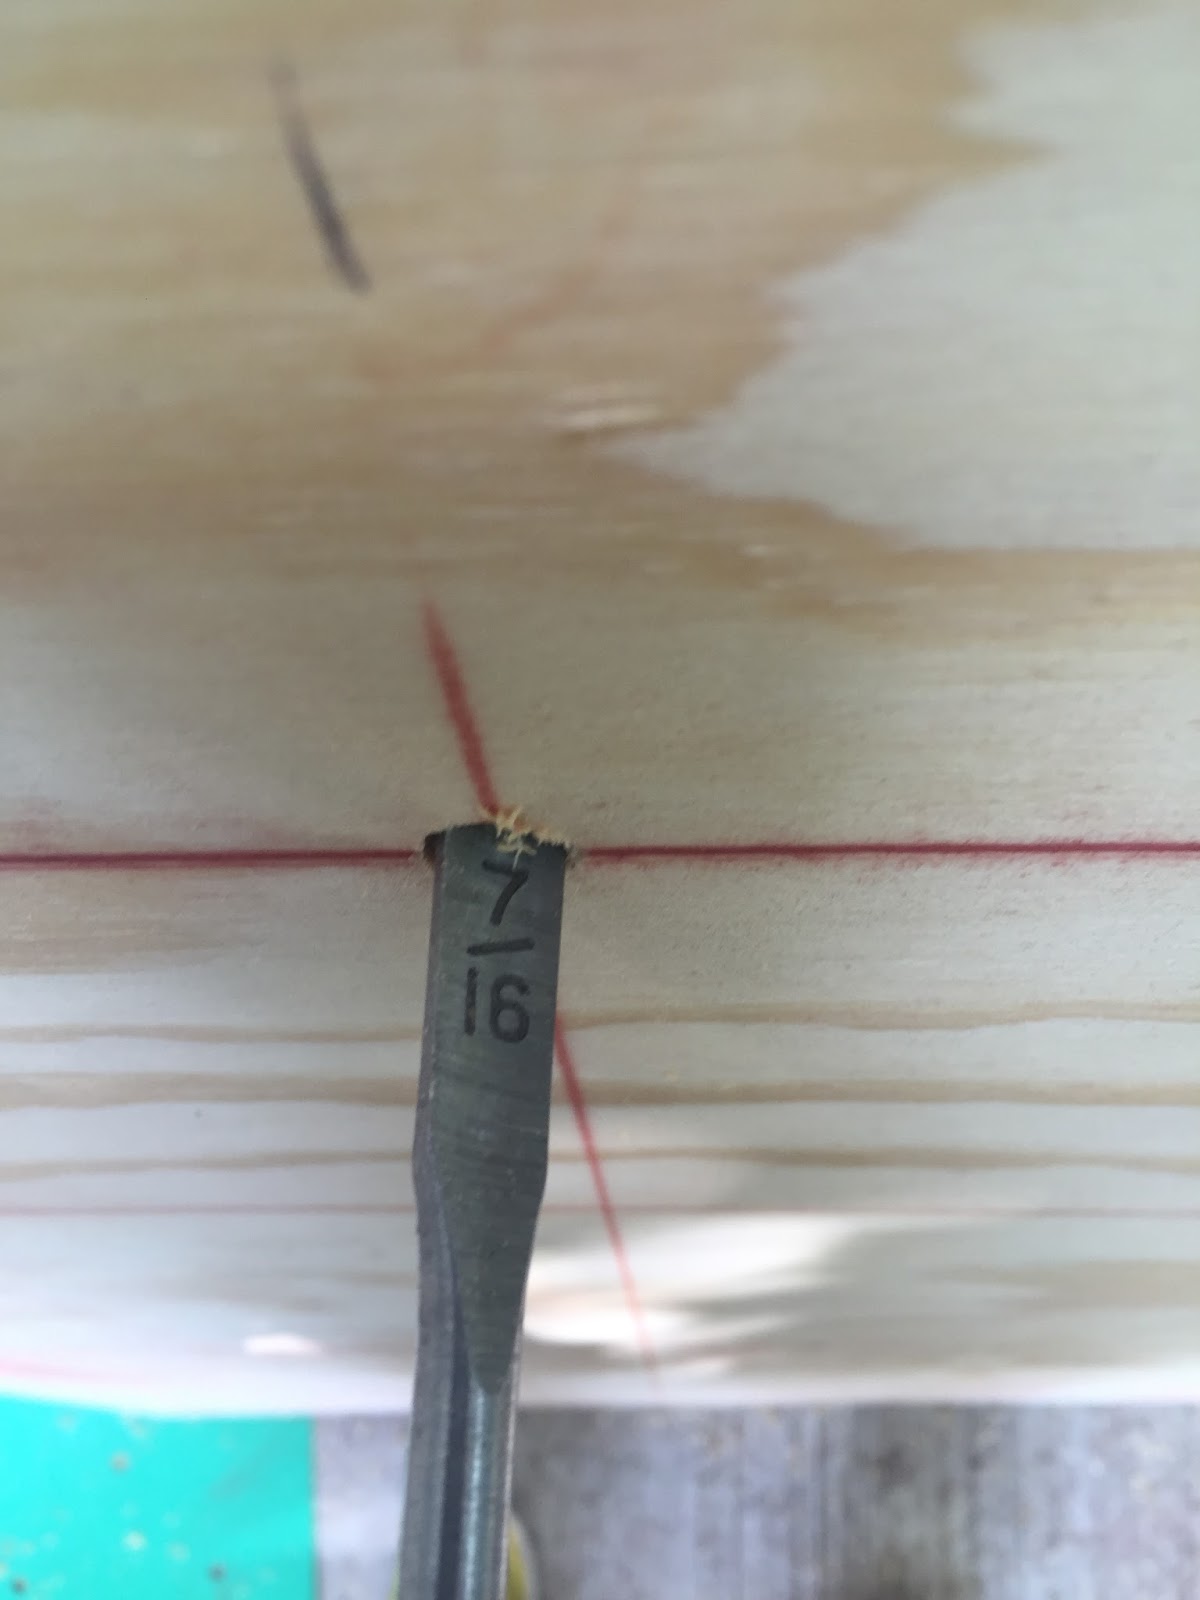

Then from the front side I drilled out the rest.

 |
| drilling from the back and then the front |
 |
| drilling from the back all of the way through |
From the two pictures above you can see that the first two sheets (bottom picture) have torn up holes where the spade bit tore up the front. The top picture of the two shows what the front and back look like drilling from both sides. It’s a much nicer finish with less sanding and far less splintering.
I used the spiked t-nuts and not the t-nuts that you secure with screws. One of the reference guides recommends putting glue on the t-nuts. I bought Gorilla Glue Construction Adhesive, but did not use any. This may be a mistake on my part for later on, but I chose not to use any glue. It’s your call how you do that part.

To install the t-nuts was pretty simple. I took a piece of 1×2 and cut it about 4 -6″ in length then using the spade bit I drilled a hole through. I then used a washer on the front with a 3/8″ bolt (3/8″ 18 to match the t-nut threads). I had a hex bit for my cordless drill that matched the hex of the 3/8″ bolt.
The first board I worked on we drilled all of the holes then placed t-nuts down and hammered each one to hold it in place temporarily then lifted the board and hand tightened each one… that sucked.
With the plywood on its “side” I was able to put one hand over the plywood to the back and hold t-nuts in place while my other hand used the drill to pull the t-nuts in. This made it much faster.
I put the plywood on it’s side and held the t-nut in back with my hand.

From the front I used the cordless drill to pull the t-nut into place. The wood block and washer are to keep from marring the surface and for leverage to help pull the t-nut into place.

I did make a mistake by not using a flat hex bolt. The head on the hex bolt I used is a conical shape and cuts into the washer and the piece of wood. Eventually it bows the washer and splits the wood. I went through multiple pieces of 1×2 to finish all of these t-nuts.
There are two ends to your plywood. One that starts with 3″ and one that has 2″. I chose the 3″ for the “top” of my sheets. At this point I measured from the ceiling to the middle of the first 2×4, which was 7″. Then I measured down from the top of my plywood sheet and drilled a hole on the left and right side about 1.5″ in. I then used the 2″ screws I bought to start in the plywood. I had a friend lift the panel and put it into place while I put in the first two screws. This is how the other two panels were put up; butting them up against the first piace.
I also checked level vertically to see how off it was. It turns out my ceiling and my end wall were not square.

 |
| you can see the screws on each 2×4 – not an exact line |
 |
| screws about every 3.5″ – one at each t-nut and one half way between |
 |
| You can see that the left side of the wall was not square |
I put two layers of gym mats on the floor. As the boards start 27″ off the ground it’s still quite a drop to jump down. I will probably put some padding on the lower part of the wall in case of foot kicks. I may also put some more holds there. I don’t know yet.
 |
| holds from Rocky Mountain Climbing Gear |
 |
| Lucas marking some routes |
 |
| allie climbing the 2x4s as no holds were up |
 |
| Lucas testing his route |
I have two types of holds: 100 holds from Rocky Mountain Climbing Gear which came with t-nuts and 3/8″ bolts. And 5 Metolius mini-jugs (the colored ones). Both types feel great. The RMCG ones feel more like rocks and are smaller so you have more gripping to do. I like both types a lot.
I think that’s it. Thanks for reading and I hope this helps you with your home climbing wall.
TLDR;
Materials needed:
2x4s
plywood sheets
100 3/8″ t-nuts per plywood sheet
2″ #8 screws
3.5″ #8 screws
7/16 spade bit
drill or cordless drill
measuring tape
pen
chalk line
scrap piece of wood
3/8″ 16 hex bolt for securing t-nuts
allen wrench for 3/8″ 16 bolt
1) measure size
2) mark studs
3) put up 2×4 screwing in to the studs with 3.5″ bolts
4) measure 14 or 14.5″ up from the top of the base 2×4 board and mark for the bottom of the next 2×4
5) pick which side of your plywood you want to put a chalk line on.
6) start marking both sides from the top 3″ then add 7″ all the way down (3″, 10″, 17″, 24″, 31″, etc)
7) mark the horizontal the same way
8) use a chalk line to mark out the lines forming a grid
9) using a 7/16″ spade bit drill out the holes at each intersection of the grid (either by drilling one side then the other or drilling all of the way through – for more details read that section of the post above)
10) with the plywood on its side place a t-nut in back and use a cordless drill, hex wrench, or socket with hex adapter to tighten down a hex bolt through a piece of wood to pull the t-nut through – you make the call on if you want to put glue on each t-nut or not
11) drill two holes in the top of the plywood where they would overlay with the top 2×4
12) with someone lifting the plywood panel up screw in 2″ screws to hold the panel in place.
13) drill holes through plywood only to screw the plywood down more to secure it in place
14) secure holds in place
15) start climbing
http://www.threeballclimbing.com/how_to_build_a_climbing_wall.htmd
http://www.metoliusclimbing.com/pdf/How-to-Build-a-Home-Bouldering-Wall.pdf
https://www.atomikclimbingholds.com/how-to
