UPDATE – 10/10/14: I will also be getting one of these: http://www.seeedstudio.com/depot/LinkIt-ONE-p-2017.html since it has a bunch of this stuff already integrated. It’s a bit more than the Mega, but it’ll be worth it.
I’ve wanted to create a HUD for nearly 20 years; with the arrival of my motorcycle this has become a bit more important to me to do. The speedometer is on the tank and with a full face modular helmet on I must look nearly straight down to see it. I currently am using a Zefal ZConsole (http://www.zefal.com/en/bags/229-z-console.html) on my handlebars which was built for a bicycle. I mounted it, then tried it out at 45 and it didn’t fly off so I tried it at 60 and nothing, so I added two precautionary zipties crossed over the mount and it doesn’t even move. It’s also waterproof and impact resistant. I can disconnect it when I stop. For a phone case mounted to a motorcycle it’s nice. And, of note, I don’t have a windscreen of any kind so this gets battered around as much as anything and it stays put.
The problem with this setup is that I still need to look down some, not as much, but still some. I want to be able to know what the speed is out of the corner of my eye.
So that’s my excuse for building this HUD.
This HUD isn’t going to be anything spectacular, just a start. I’d like to do something like what NuViz has out there, but open source it so anyone can make improvements. I realize that this is a prototype and other companies have spent a lot of money on their HUDs. This is for fun and hopefully someone comes up with additional awesomeness for it.
I was inspired by a few different projects out there – namely these two:
http://hackaday.io/project/2068-%2460-bluetooth-head-mounted-display.-
http://hackaday.io/project/1156/log/3562-medicycle-helmet-display-update-1
http://hackaday.io/project/1156/log/9744-head-mounted-display-progress
I have a full list of things I want to be able to do; like show navigation, speed, mpg, weather, record video and audio, and on and on. None of that is important to this entry, my actual work will start with this basic, which is displaying speed from an iPhone.
Let’s start with the parts:
Arduino Nano or Mega (I didn’t use anything else)
Adafruit BLE
SainSmart OLED
I’ve talked about all of these parts at one point or another in other entries. I’m not going to go back over them.
In one of my last blogs I put some pictures out of the Nano pin schematics – http://holoprinter.blogspot.com/2014/10/sd-card-and-arduino-nano.html
I only mention this because the pins for the Mega and the Nano are different. I also know I’ve talked about that here (http://holoprinter.blogspot.com/2014/10/sd-card-and-arduino-mega.html).
This is important as both the BLE and the OLED will be lined up on pins that are different than what you’d expect.
These are the pins for the BLE (D# is for Digital and A# is for Analog)
| line | Mega | Nano |
| SCK | 52 | D13 |
| MISO | 50 | D11 |
| MOSI | 51 | D12 |
| REQ | D10 | D10 |
| RDY | D2 | D2 |
| ACT | D9 | D9 |
These are the pins for the OLED
| line | Mega | Nano | |
| SCL | 21 | A5 | |
| SDA | 20 | A4 |
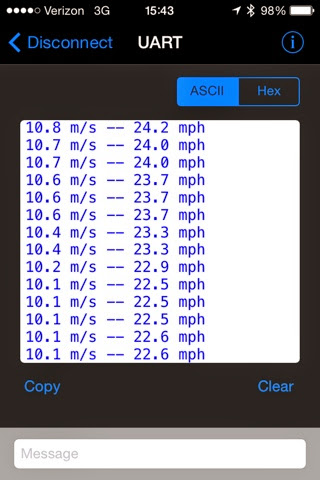
Here’s a screenshot of the Adafruit BLE sample app taken from my phone. Every 1/10th of a second it calculates speed (but not if in the background, I need to work on that – and code coming soon. I may clone their git repo for this project and make my changes or I may just put the code for the one class here.)
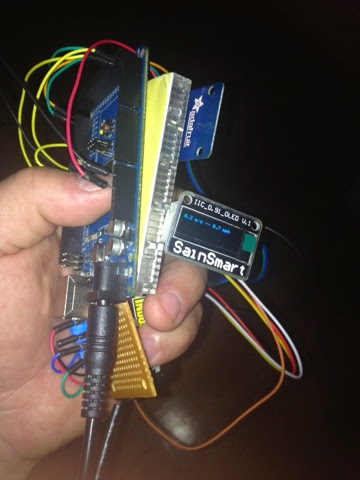
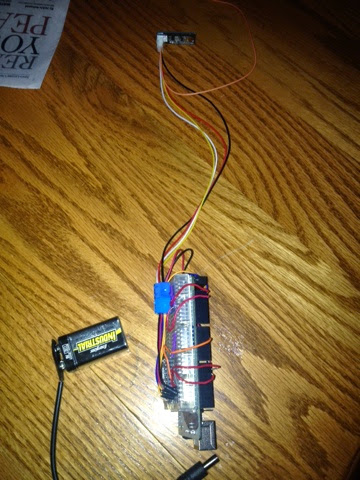
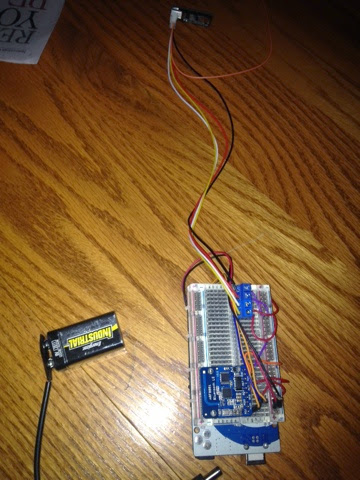
I attached the breakout board to the bottom of the Mega and then wired everything up. I was going to do a shield for the mega, but the proto board won’t be in for a while. When that comes in I’ll solder some female pins on it so I can remove the OLED and the BLE and put them on another project if I need them. Eventually, the OLED will be attached to some maginfying lenses and a transparent display so it can be worn on the helmet.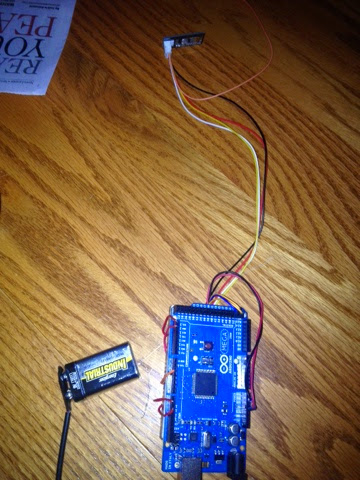
That’s it for Part 1.
The next steps are to:
- take the magnifying lenses and put them together with the transparent “eyepiece”
- upload the code for the Arduino to github (after I do some work to it) – https://github.com/cdrchops/HUDuino
- upload the code for the Adafruit branch (after I do some work to it)
- figure out the mounting for the helmet
- print a case using my printrbot
- test it out in a car as a passenger, then driving, then riding.
- add more crap to it so it’s even better
As a safety note: Don’t be stupid. There is danger in making and/or using this while doing any activity. You are responsible for your actions, not me.

4 Replies to “Simple HUD (electronics) with Arduino + BLE + OLED – Part 1”